Implementing Google Consent Mode v2
To implement Google Consent Mode v2 with Lawwwing, you need to have the Lawwwing script installed on your website. You can follow our installation guides.
How to Implement Google Consent Mode v2 with Lawwwing?
Verify that the Google Consent Mode v2 functionality is enabled in your Lawwwing control panel. Here's how you can enable this functionality:
- Log in to your Lawwwing account.
- Select the website where you want to enable Google Consent Mode v2.
- Go to the Customization > Design section.
- Verify that the functionality is enabled in your dashboard "Enable Google Consent Mode v2".

- Once verified, the consent banner will adapt to send the consent status using the APIs of Google Consent Mode v2.
- Optionally, you can use our Google Tag Manager template. You can find more details on installation and configuration in this guide.
Configure Default Settings
When you have installed the Lawwwing script directly on your website, you can configure default settings (prior consent) through the integration of the Google Consent API by adding the following code snippet to your website.
You can use the following example code:
<script>
    window.dataLayer = window.dataLayer || [];
    function gtag() {
        dataLayer.push(arguments);
    }
    gtag("consent", "default", {
        ad_personalization: "denied",
        ad_storage: "denied",
        ad_user_data: "denied",
        analytics_storage: "denied",
        functionality_storage: "denied",
        personalization_storage: "denied",
        security_storage: "granted",
        wait_for_update: 500,
    });
    gtag("set", "ads_data_redaction", true);
    gtag("set", "url_passthrough", false);
</script>
You can change the values of default consent types to "granted" or "denied" if you want to set a default option before the end user has given their consent, for example, allowing a default opt-in under CCPA.
URL passthrough: When a user rejects cookies, there is an alternative solution to pass the data that would normally be stored in the "_ga" cookie by adding it to the URL as a query parameter. To enable this, set the URL passthrough to "true" with gtag("set", "url_passthrough", true);
The script with the default configuration should be included before any gtag.js or GTM code snippet.
If you need additional assistance or have questions, feel free to contact us and we will be happy to help you 🙂
Additional Consent Checks
Some specific tags (such as Google Ads, Analytics, Floodlight, and Conversion Linker) include built-in consent checks. This means these tags automatically adapt to the user's consent status. There's no need to manually configure consent for these types of tags.
Tags that do not have built-in consent checks must be configured with additional consent checks.
These tags will only fire if the user has given consent for the corresponding consent category. To configure them, follow these steps:
-
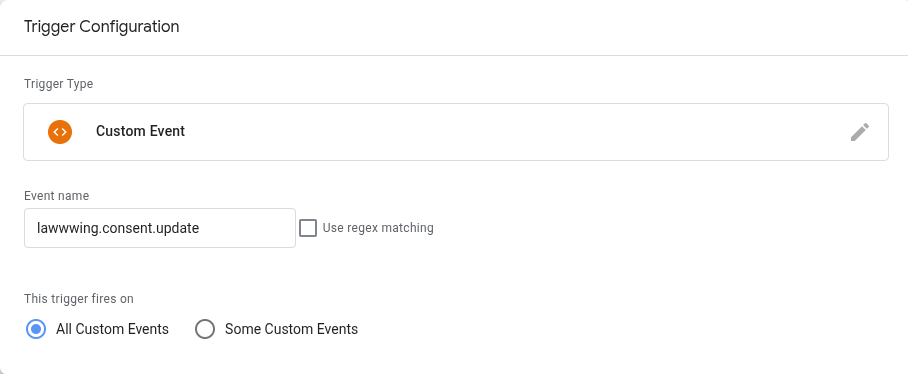
Open Google Tag Manager and create the following user consent trigger:
- Name: lawwwing.consent.update
- Type:
Custom Event - Trigger:
All Events
-
Configure additional consent for tags
Edit the consent settings for all tags that need to be configured with additional consent checks.
You can find these options at: Tag Editor > Advanced Settings > Consent Settings. Add all the consent categories that the tag requires.
In this example, the tag requires consent for
ad_personalization.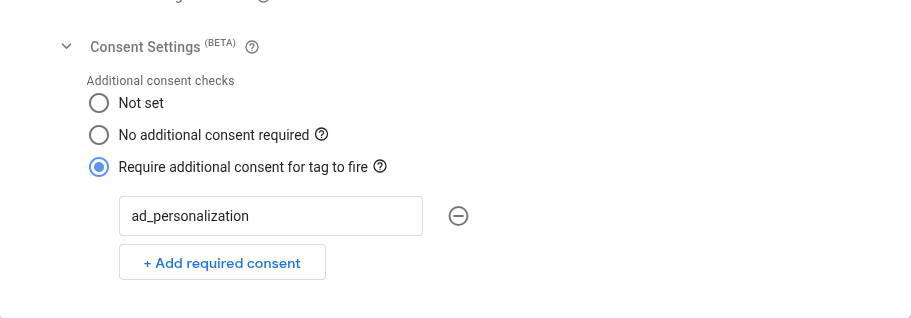
-
Ensure the tag fires once consent is obtained
To ensure the tag fires after the user's consent has been determined, you need to configure the tag's trigger to fire on the custom event you created in step one.
- Trigger: lawwwing.consent.update
Below is an example with a Example Tag, which with this configuration, will only fire if the visitor has accepted the required type of consent.

If you have questions or concerns, don’t hesitate to contact us — we’ll be happy to help 🙂