Steps to Follow
Integrating Lawwwing with your website is a fundamental step to start complying with data privacy regulations and standards. Below, we will provide you with a step-by-step guide to effectively integrate Lawwwing on your website.
Step 1: Access your Lawwwing account
- Log in to https://lawwwing.com/login/.
- Once you have logged in, you will be in your Lawwwing dashboard.
If you don't have a Lawwwing account yet, follow the getting started guide.
Step 2: Get your installation code
After you have added your website to Lawwwing, we will assign you a unique installation code for your website. Follow the steps below to obtain it:
- In your dashboard, select the website you want to integrate.
- Look for the Installation section and you will find the custom integration code.
- Copy the code snippet you find.
<!-- Lawwwing Plugin for https://your-website.com -->
<script src="https://cdn.lawwwing.com/widgets/current/<your-client-id>/cookie-widget.min.js" type="text/javascript" data-lwid="<your-client-id>"></script>
This code is just an example; you will find yours inside your dashboard.
Step 3: Add the code to your website
Now, you need to add the integration code to your website.
The specific steps may vary depending on your website platform or CMS. Here is a general guide:
Custom HTML/CSS:
Open your website's HTML file and add the installation code between the <head> and </head> tags before any other scripts on all pages where you want to integrate Lawwwing. It should look something like this:
<!DOCTYPE html>
<html>
<head>
    <!-- Lawwwing plugin for https://your-web.com -->
    <script src="https://cdn.lawwwing.com/widgets/current/<your-client-id>/cookie-widget.min.js" type="text/javascript" data-lwid="<your-client-id>"></script>
    <!-- Otros elementos del head -->
</head>
<body>
    <!-- Contenido de tu página -->
</body>
</html>
Other platforms and CMS:
Refer to our installation guides for detailed instructions for each provider.
It is important that when adding the installation code, you do it on all pages of your website to ensure that Lawwwing is present on all of them.
Step 4: Verify the installation
Once you have completed the installation on your website, verify that Lawwwing is working correctly. Open your website and make sure the Lawwwing banner is displayed correctly.
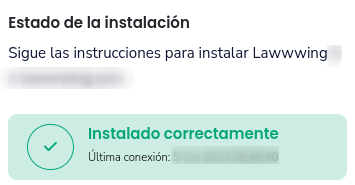
You can also validate your installation from the Lawwwing control panel:

🚀 That's it! Lawwwing is now active on your website 🚀
For more details on how to make the most of Lawwwing, visit our Configuration section.
If you need additional help or have questions, feel free to contact us and we will be happy to assist you 🙂