Google Tag Manager
In this section, we will provide detailed instructions for integrating Lawwwing into your website using Google Tag Manager. If you prefer, at the end of this guide you will find a video tutorial to do so.
How to install Lawwwing on your website with GTM?
When you use Consent Mode with Lawwwing, your users' consent choices trigger adjustments in tag behavior, instructing Google to stop collecting personally identifiable information. Instead, aggregated information is used, ensuring privacy compliance and enhancing your control over data collection and usage on the website.
Before starting the installation, first verify that GCM support configuration is enabled within your account settings. If you have not activated this configuration, enable it now to ensure the full functionality of the banner:
To proceed with the setup, make sure you have an account on Google Tag Manager with a container associated with your website. If you need additional assistance or have questions, feel free to contact us, and we will be happy to help 🙂
Access your Tag Manager dashboard
Step 1: Add a new tag
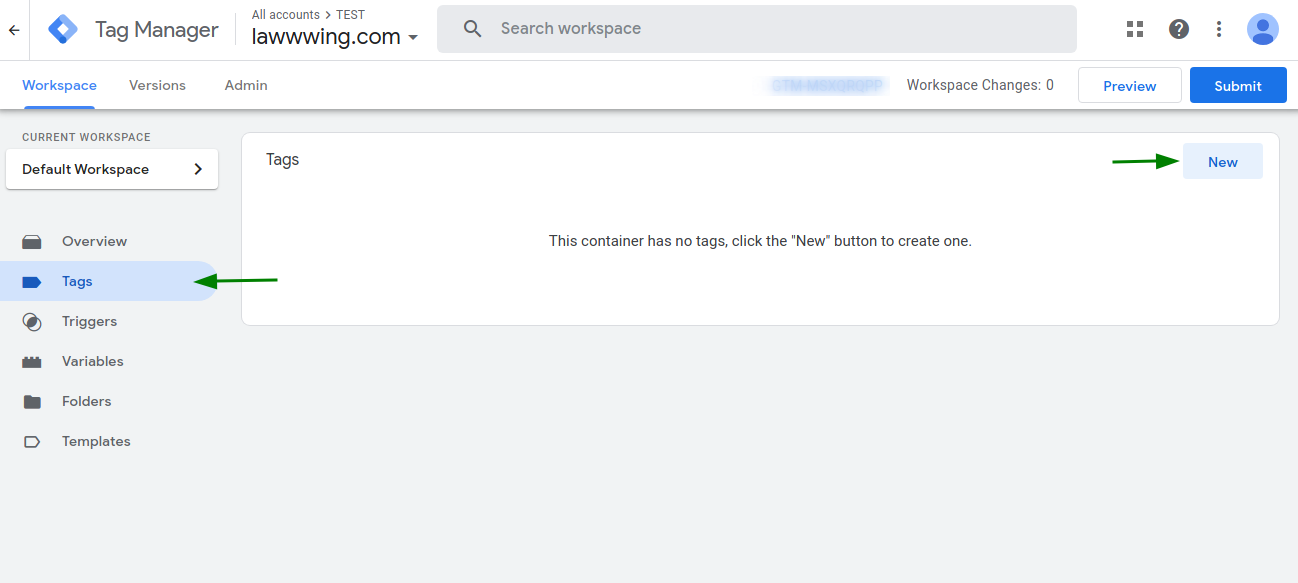
Step 2: Click on "Tag configuration" and select the option to view community templates
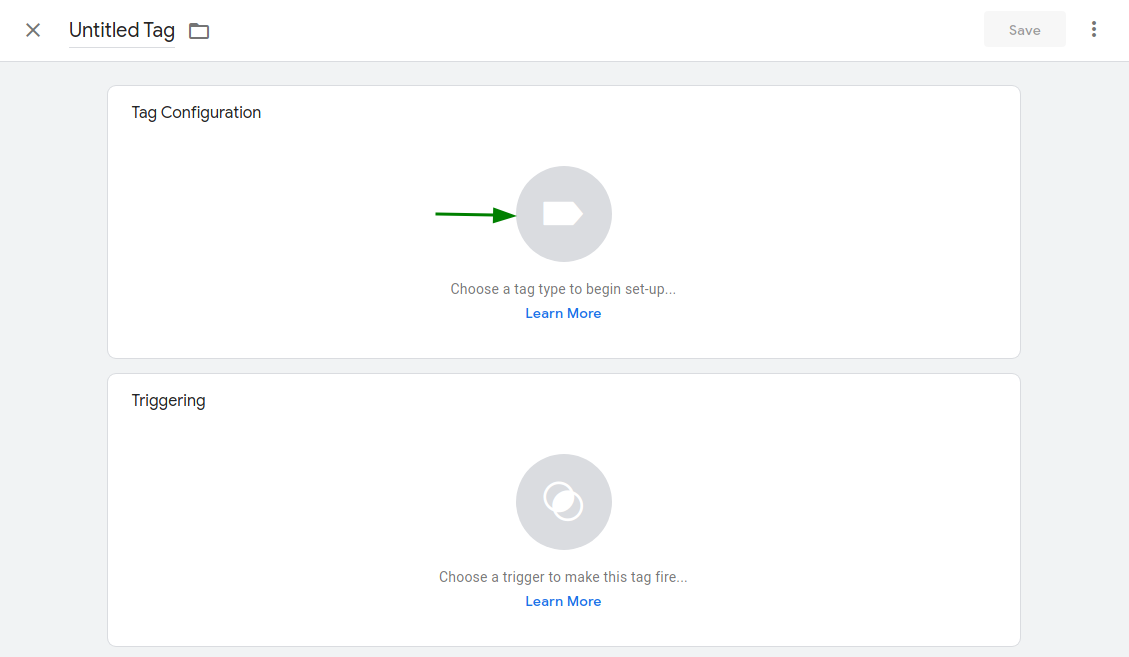
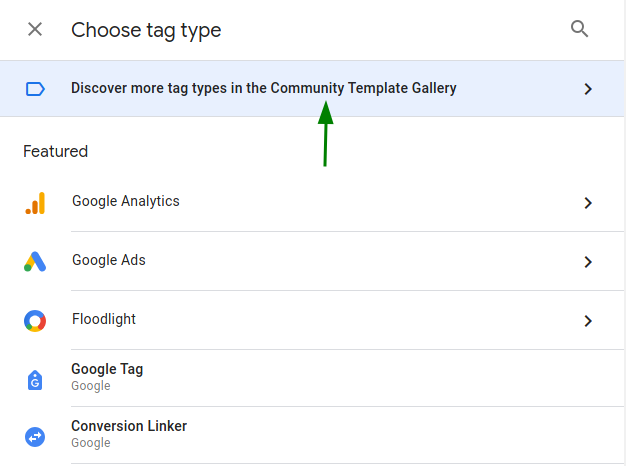
Step 3: Search for the Lawwwing template and add it to your workspace
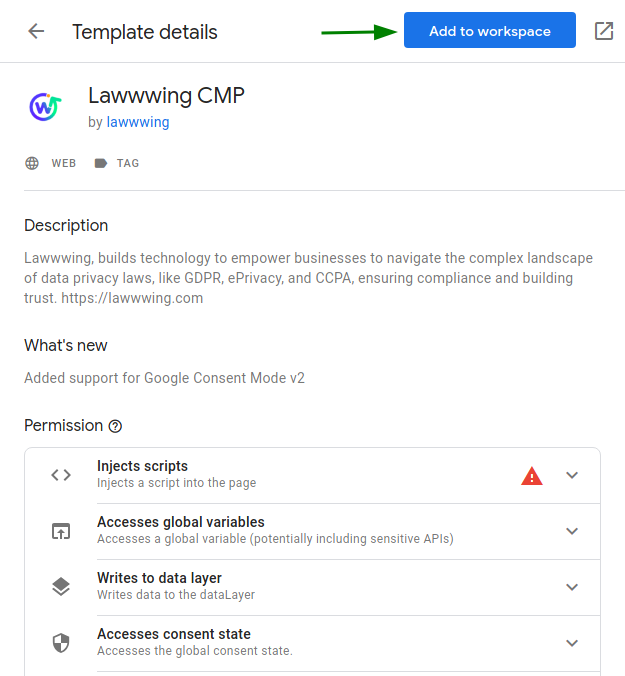
Step 4: Add the necessary configuration including the ID you will obtain from your Lawwwing control panel.
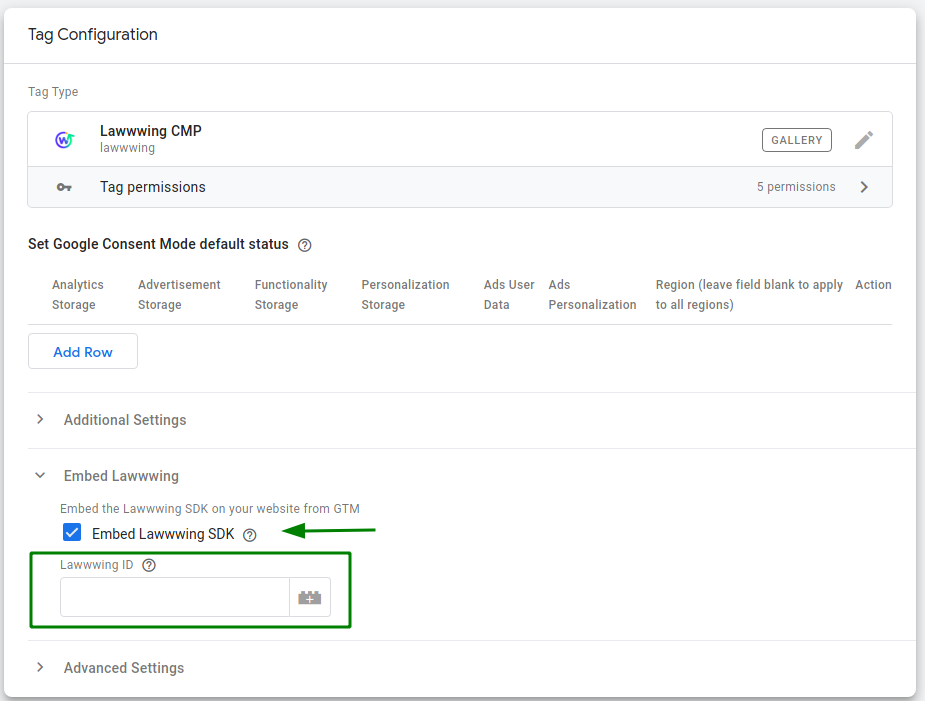
In this step, in addition to adding the Lawwwing ID for installation, you can add and modify any extra configuration you may need:
- such as the default state of the consent types
Step 5: Select the Trigger/Consent Initialization Activator for this Tag
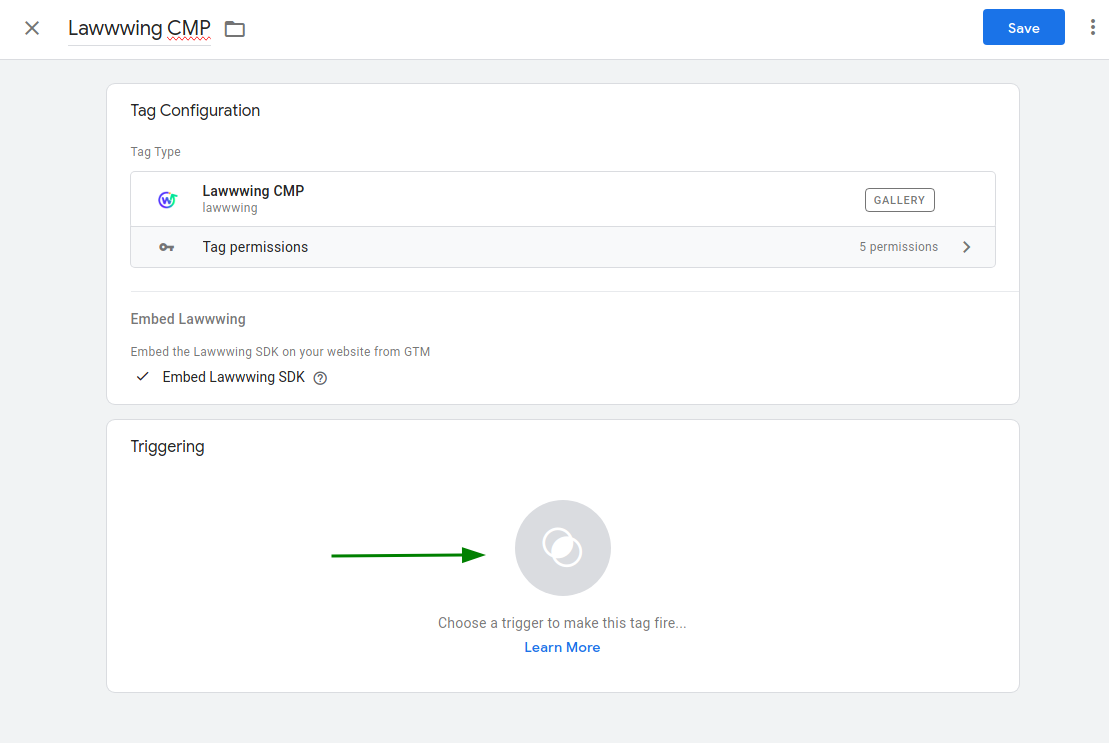

Step 6: Save and publish the configuration with the new Lawwwing tag added
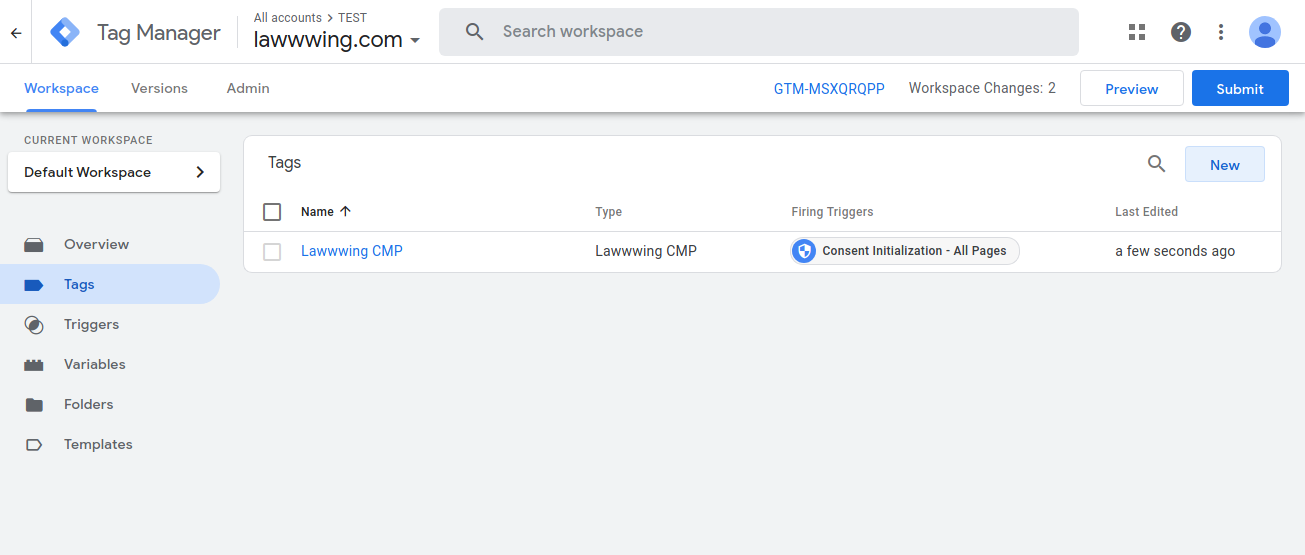
🚀 That's it! Lawwwing is now active on your website 🚀
Video Tutorial
For more details on how to make the most of Lawwwing in Google Tag Manager, visit our Configuration section.
If you need additional assistance or have questions, feel free to contact us and we will be happy to help you 🙂