Hubspot
In this section, we'll provide you with detailed instructions to integrate Lawwwing into your Hubspot quickly and easily.
To follow this guide make sure you have administrator access to your Hubspot account.
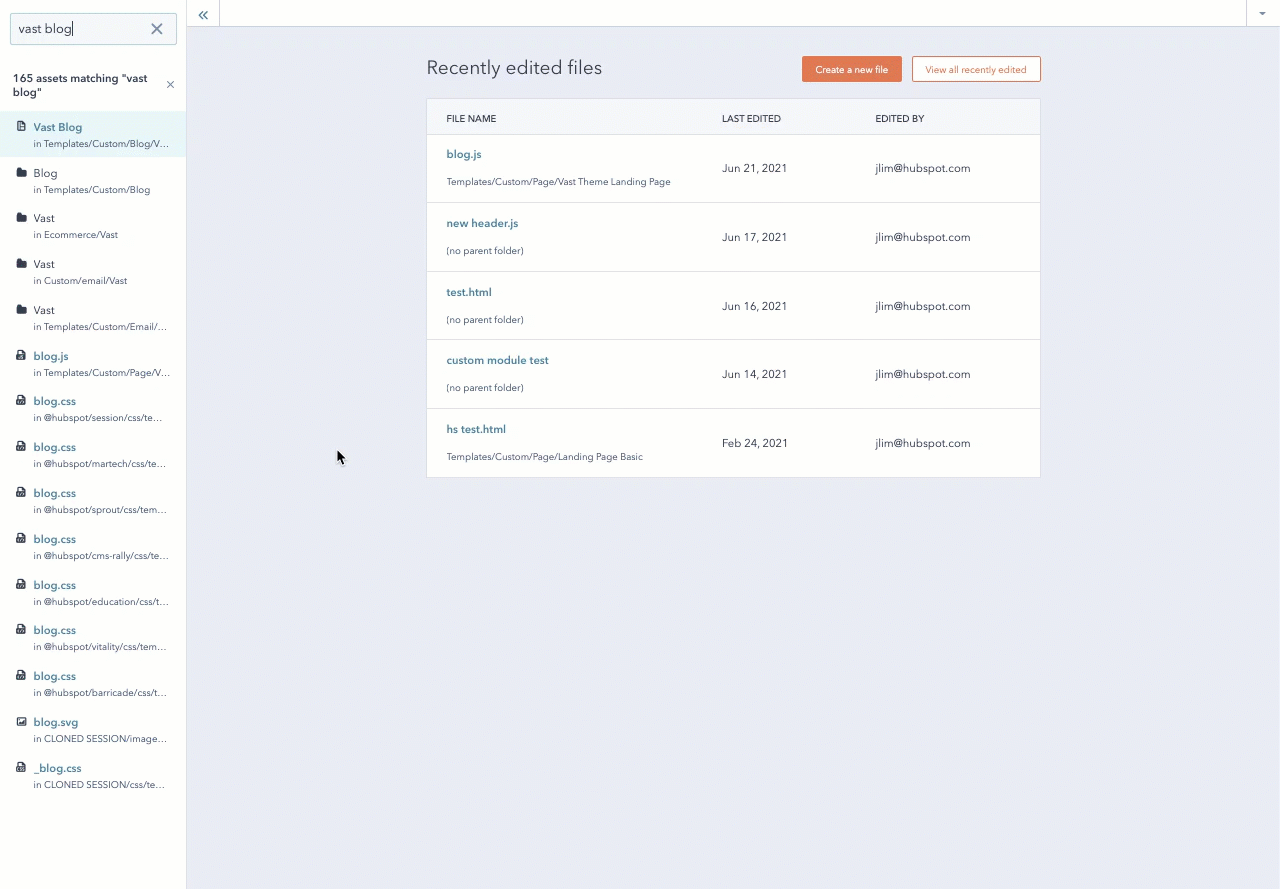
Step 1: Create a new JavaScript file in Hubspot
- Go to your Hubspot account.
- 1.1 Click on Marketing > Design Tools.
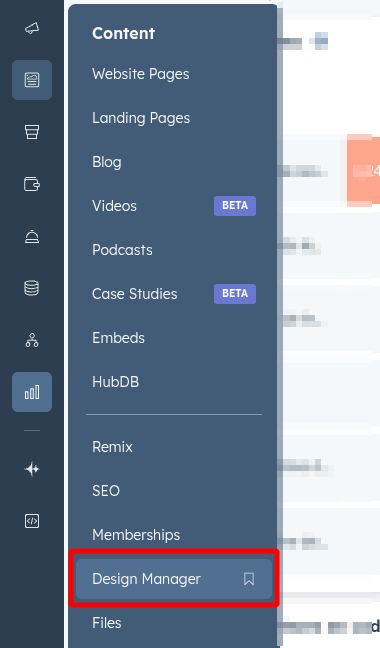
-
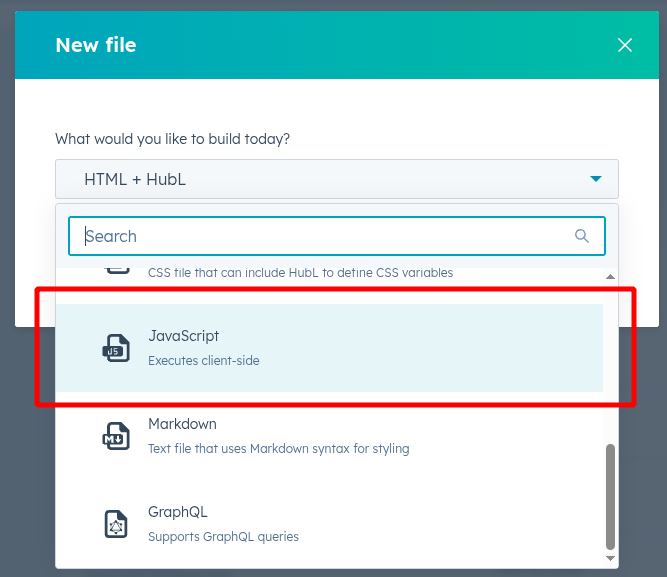
Create a new JavaScript file.
- 2.1 Click the "File" button and select New file.
- 2.2 Select JavaScript as the file type.
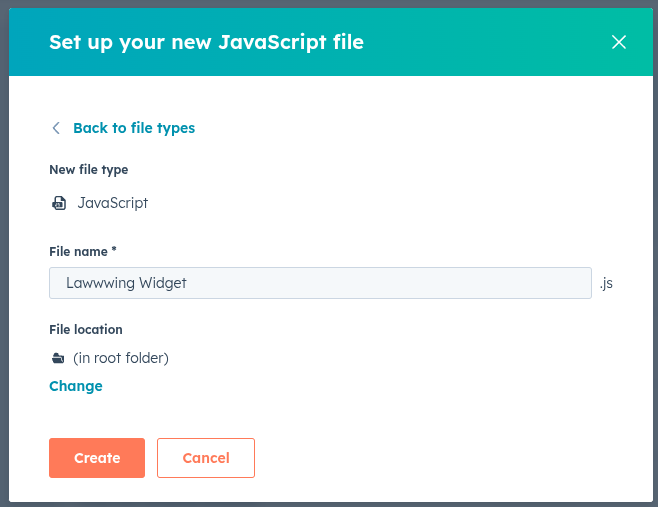
- Name the file as
Lawwwing Widgetor a similar descriptive name. - Select the location where you want to save the file.
- Click Create to create the file.
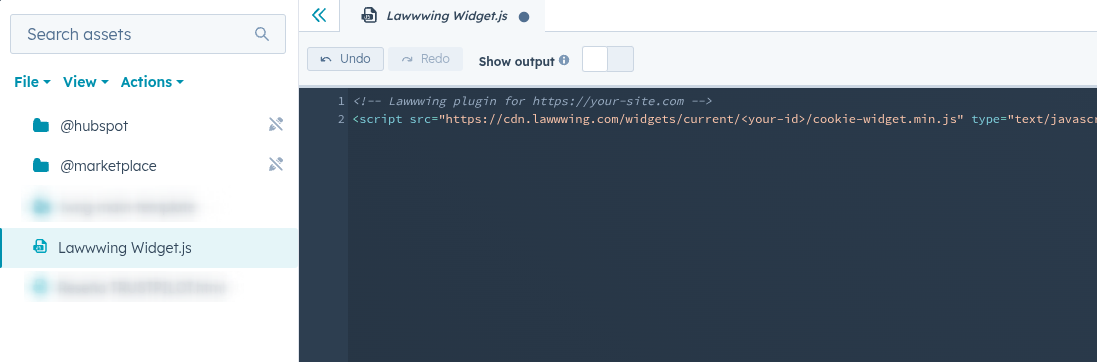
- Copy and paste the code snippet you'll find in the installation section of your Lawwwing dashboard.
<!-- Lawwwing plugin for https://your-site.com -->
<script src="https://cdn.lawwwing.com/widgets/current/<your-client-id>/cookie-widget.min.js" type="text/javascript" data-lwid="<your-client-id>"></script>
This code is just an example; you'll find yours inside your control panel.
- Save and publish the changes to the file.
Step 2: Attach the JavaScript file to your template
- In the left sidebar browser, click on the template you want to update.
- In the right inspector, click on the Edit tab.
- In the Linked JavaScript files section, click on the Add dropdown menu and select your JavaScript file.
- In the top right, click Publish changes to finalize the changes.
🚀 That's it! Lawwwing is now active on your website 🚀
For more details on how to get the most out of Lawwwing in Hubspot, visit our Configuration section.
If you need additional assistance or have questions, don't hesitate to contact us and we'll be happy to help you 🙂
Include a JavaScript file in HubSpot pages
You can include your JavaScript file on all pages of a domain hosted on HubSpot, or on individual pages using the public URL.
Get the public URL of the JavaScript file
To be able to add the JavaScript file to your HubSpot pages, you first need to get the public URL of the file you created in the previous step.
To access the public URL of the file:
- In the left sidebar menu, select your JavaScript file.
- Click Actions > Copy public URL.
Add the file to all your HubSpot pages on a domain:
-
In your HubSpot account, click the Settings icon in the top navigation bar.
-
In the left sidebar menu, navigate to Content > Pages.
-
Click the Choose a domain to edit its settings dropdown menu and select the domain you want to add the JavaScript file to.
- You can select Default settings for all domains if you want the JavaScript file to apply to all connected domains.
-
In the Site footer HTML section, paste the public URL as the source value of the
scripttag:<!-- start Main.js Do Not Remove -->
<script src="insert your file's public URL here"></script>
<!---End Main.js--> -
Click Save.
Add the file to an individual page:
-
Go to the content where you want to add the link:
- Website pages: In your HubSpot account, go to Content > Website pages.
- Landing pages: In your HubSpot account, go to Content > Landing pages.
-
Hover over the page you want to edit and click Edit.
-
In the page editor, click the Settings menu and select Advanced.
-
In the Footer HTML section of the dialog box, paste the public URL as the source value for the
scripttag:<!-- start Main.js Do Not Remove -->
<script src="insert your file's public URL here"></script>
<!---End Main.js--> -
In the top right, click Publish or Update.