Shopify
In this section, we will provide you with detailed instructions to integrate Lawwwing into your Shopify website quickly and easily.
To follow this guide, make sure you have administrator access to your Shopify website.
Step 1: Log in to your Shopify account
Make sure you are logged into your Shopify account before starting the installation.
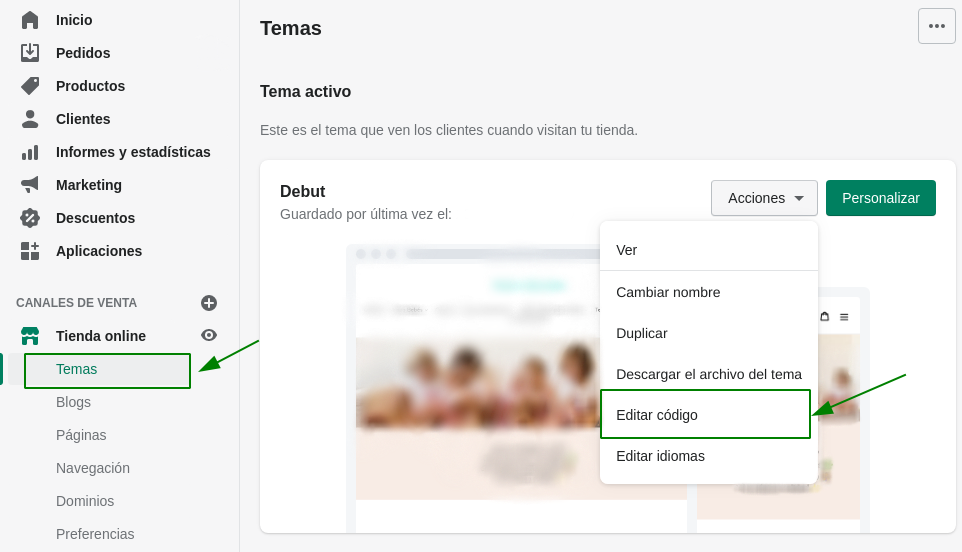
Step 2: Access the Themes section
- Open the "Themes" section within your online store
- Click on "Actions" > "Edit code"

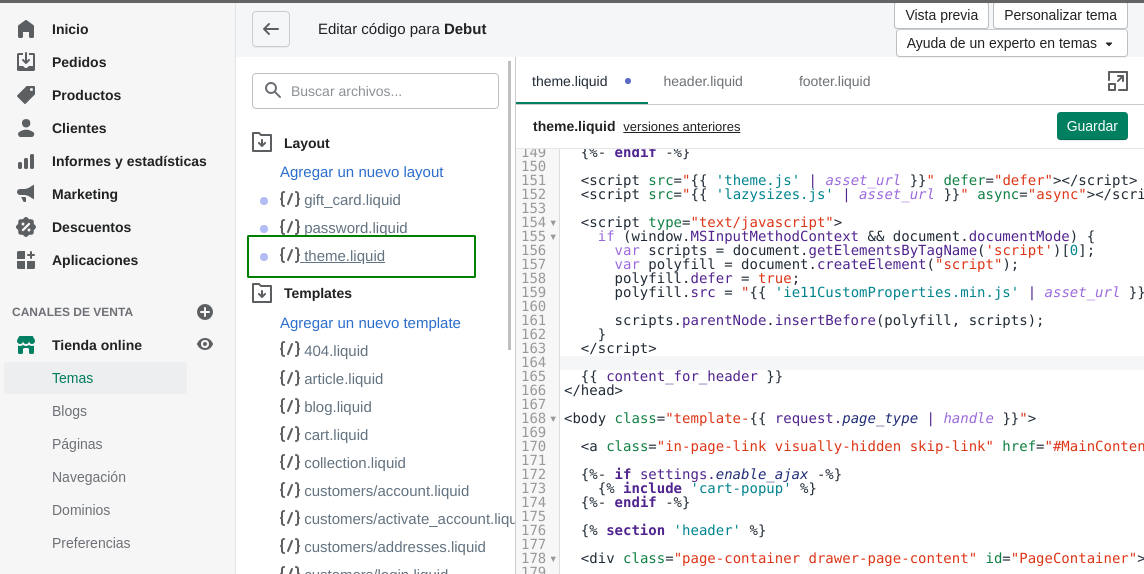
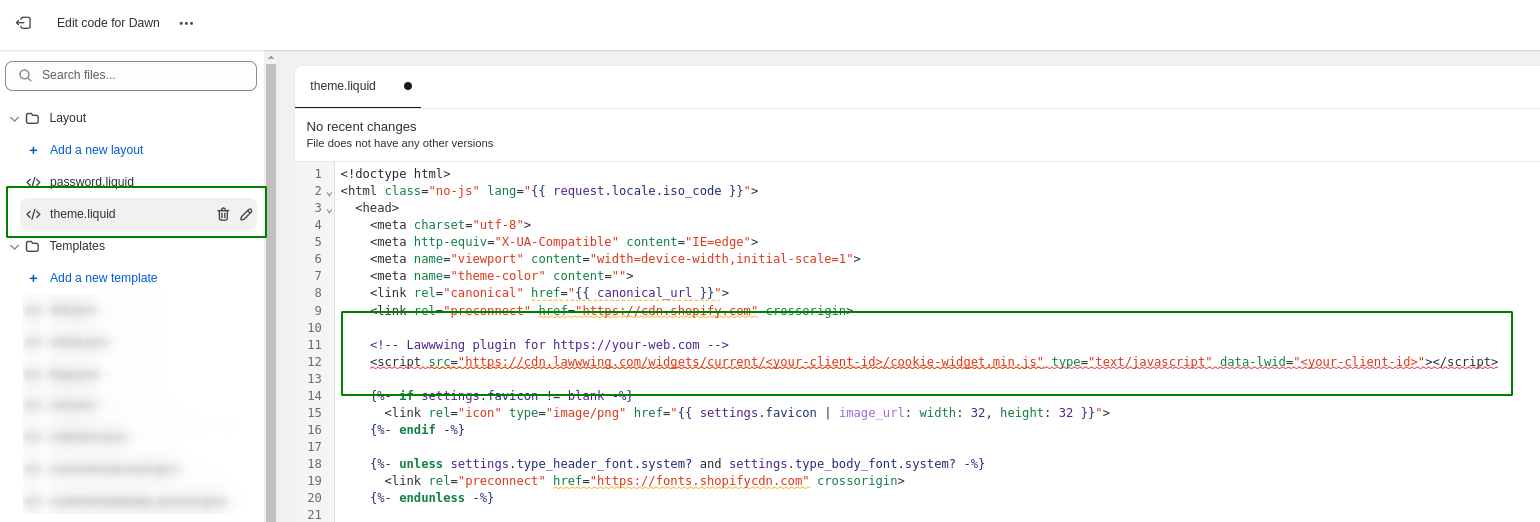
Step 3: Find and edit the theme.liquid file

- Copy and paste the code snippet you will find in the installation section of your Lawwwing dashboard.
<!-- Lawwwing plugin for https://your-web.com -->
<script src="https://cdn.lawwwing.com/widgets/current/<your-client-id>/cookie-widget.min.js" type="text/javascript" data-lwid="<your-client-id>"></script>
This code is just an example; you will find yours within your control panel.

- Save and apply the changes to your website code.
🤝 Integration with Shopify's Customer Privacy API��
Once you have completed the installation of Lawwwing on your store, integration with Shopify's Customer Privacy API will be automatically activated. This API allows merchants to efficiently manage their customers' privacy preferences and consent, complying with current regulations.
With this integration, Lawwwing automatically synchronizes the consent status with Shopify's API, ensuring that users' decisions are correctly applied to all functionalities and applications connected to your store.
No need to make any additional configurations; everything will be ready to work once Lawwwing is installed.
If you have other applications that interact with the Customer Privacy API, make sure they are properly configured to work together with Lawwwing.
✅ Validate values in Customer Privacy API
To validate that consent values are being sent correctly to the Shopify API, you can follow these steps:
-
Open your browser console (by pressing F12 in most browsers)
-
Go to the "Console" tab and copy and paste the following code:
window.Shopify.customerPrivacy.currentVisitorConsent();
- Press "Enter" and you will see an object with the current consent values.
Try changing the consent through the Lawwwing banner and re-run the code to verify that the changes are reflected correctly. The responses should look similar to these depending on each case:
{marketing: 'no', analytics: 'no', preferences: 'no', sale_of_data: 'no'}
{marketing: 'yes', analytics: 'yes', preferences: 'yes', sale_of_data: 'yes'}
{marketing: 'no', analytics: 'no', preferences: 'yes', sale_of_data: 'no'}
🚀 That's it! Lawwwing is now active on your website 🚀
For more details on how to make the most of Lawwwing on Shopify, visit our Configuration section.
If you need additional assistance or have questions, feel free to contact us and we will be happy to help you 🙂