WebNode
In this section, we will provide detailed instructions for integrating Lawwwing into your website on WebNode.
warning
To follow this guide, you must have a Standard or Professional Premium subscription on WebNode, and have administrator access.
Step 1: Access the WebNode panel
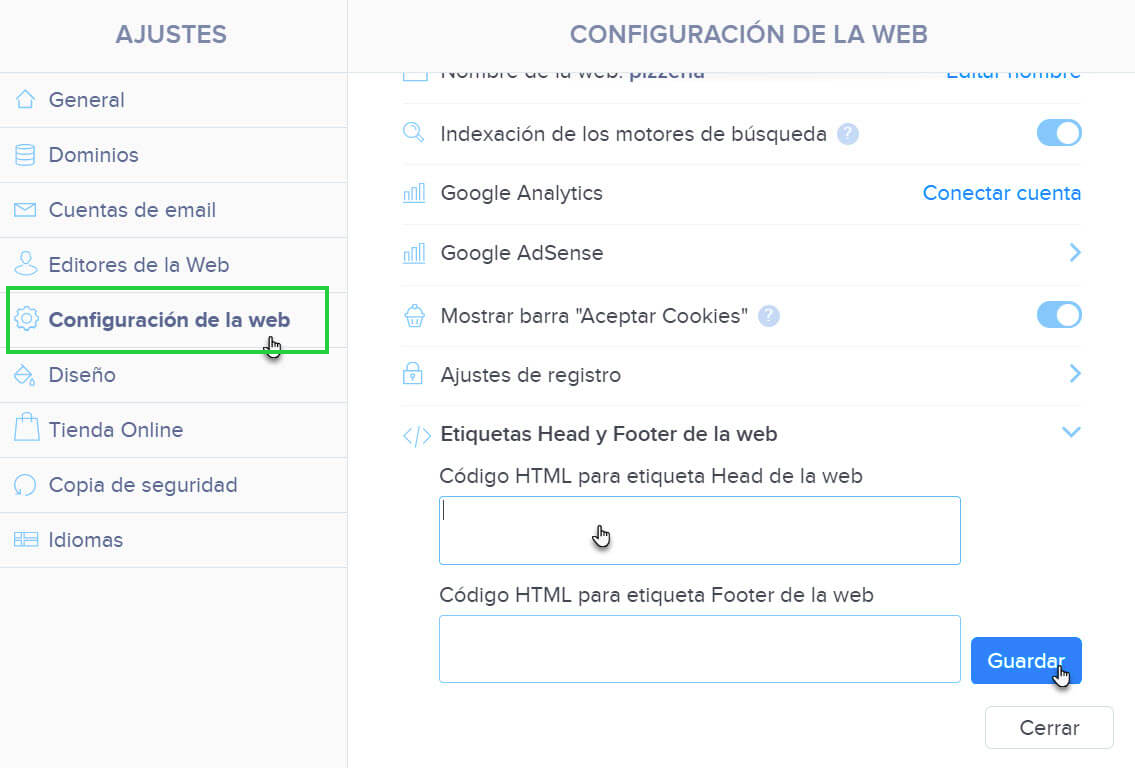
- Go to WebNode and click on "Configuración" (Settings)

- Navigate to "Configuración de la web" (Website settings)

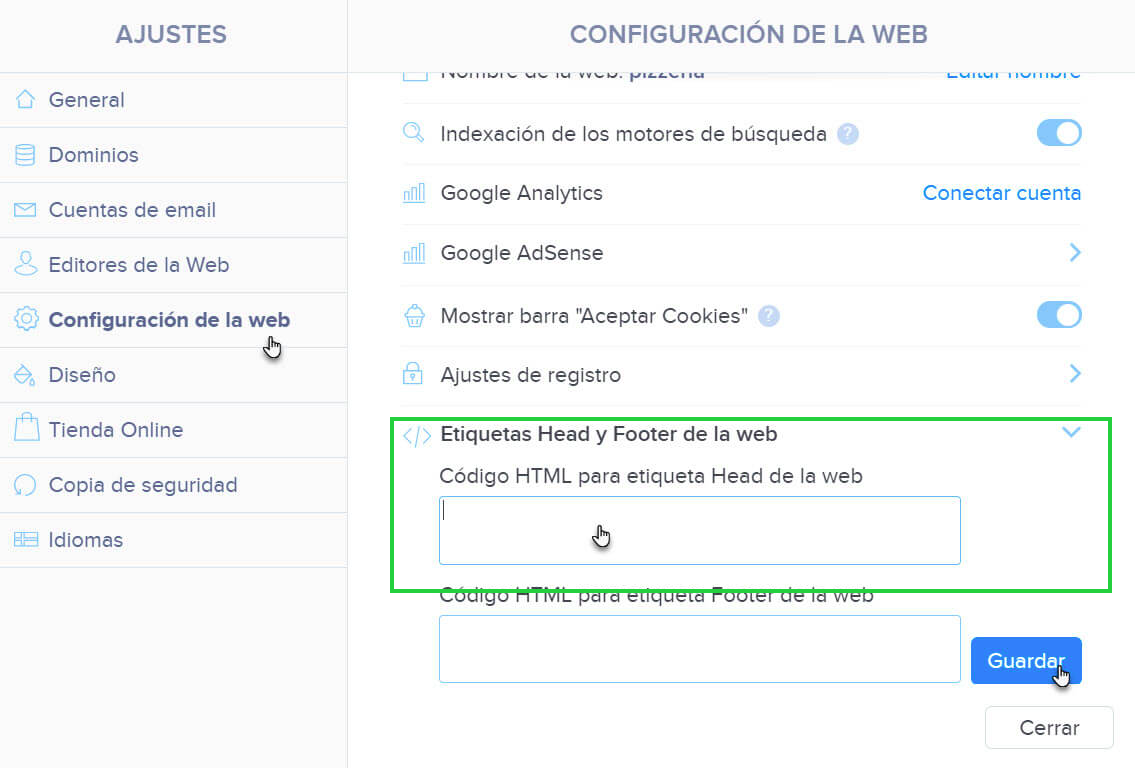
- Look for "Etiquetas Head y Footer de la web" (Head and Footer tags of the website) on the right side.

Step 2: Add the Lawwwing code
- Copy the code snippet that you will find in the installation section of your Lawwwing control panel
<!-- Lawwwing plugin for https://your-web.com -->
<script src="https://cdn.lawwwing.com/widgets/current/<your-client-id>/cookie-widget.min.js" type="text/javascript" data-lwid="<your-client-id>"></script>
caution
This code is just an example; you will find your own within your control panel.
-
Paste the Lawwwing code into the "HTML code for the Head tag of the website" section you found in the previous step
-
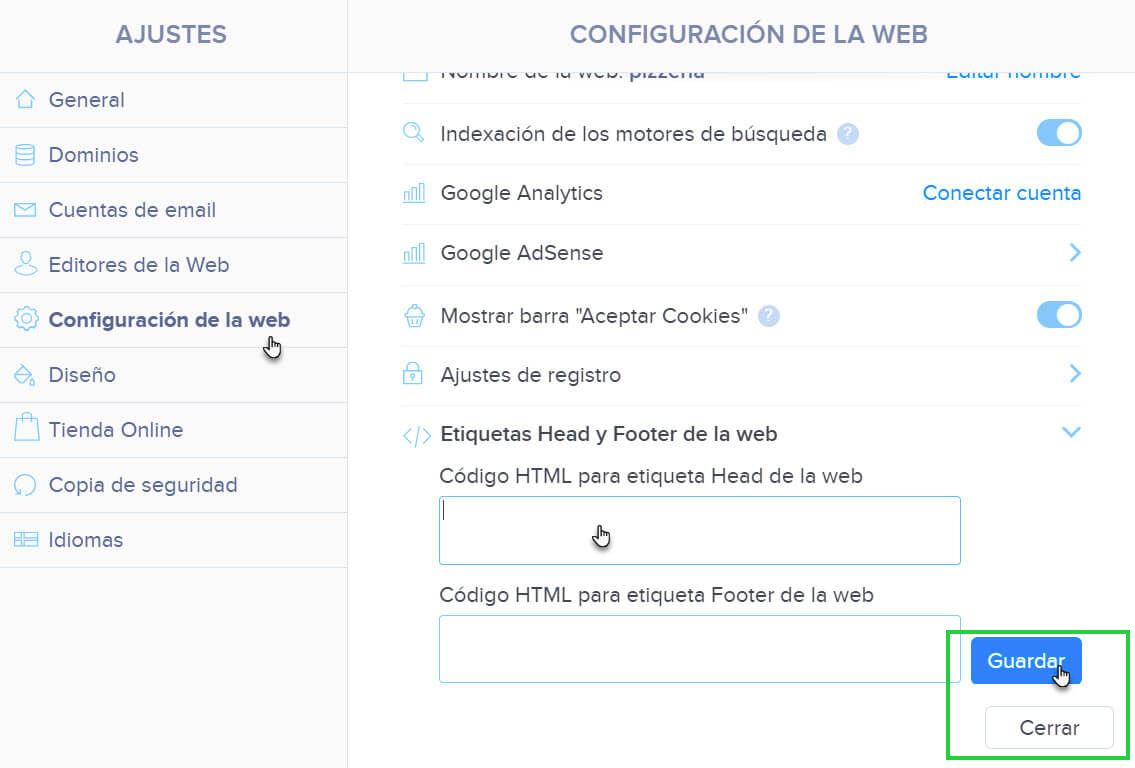
Save and publish the changes.

🚀 That's it! Lawwwing is now active on your website 🚀
More Information
For more details on how to make the most of Lawwwing on WebNode, visit our Configuration section.
If you need additional assistance or have questions, feel free to contact us and we will be happy to help you 🙂